Tuesday, 1 November 2016

Cereal Box Dividers


INSTRUCTIONS:

1. Use the drawer as a guide to mark the height around each edge of each box.


2. Using the box cutter, cut the boxes!


3. Slice down the decorative paper {any pretty paper will do}.


4. Start by using a thin strip across the bottom, attaching it to the box with double sided tape. Use a pencil eraser to push in the creases around the inside edges {carefully so the paper wouldn't tear}.


5. Tape it to the bottom of the box


6. Once the first strip is taped down nice and tight, repeat the same step the opposite direction. Again, pushed in the inside edges with a pencil eraser and taped it all down.


7. FINISHED


Photo frame


Sunday, 23 October 2016

Cat 'hammock'

Hang a basket on a tree branch in your garden for cats to rest and sleep in, or you could fill it up with flowers.


Sunday, 25 September 2016

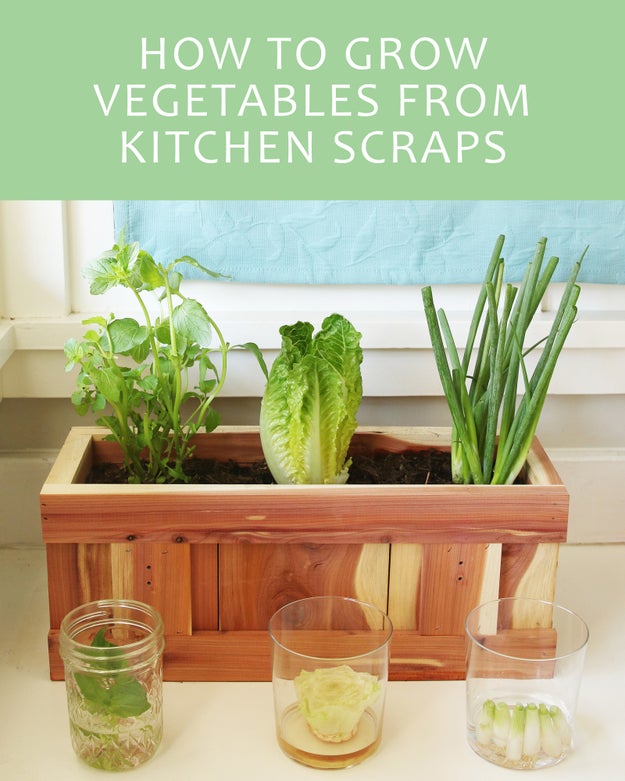
Vegetables From Scratch

How To Turn Your Vegetable Scraps Into Vegetables Again

How To Turn Your Vegetable Scraps Into Vegetables Again

Here’s a video showing you how:

Here’s what you need:

Vegetable scraps
Clear containers
Garden soil
Planter

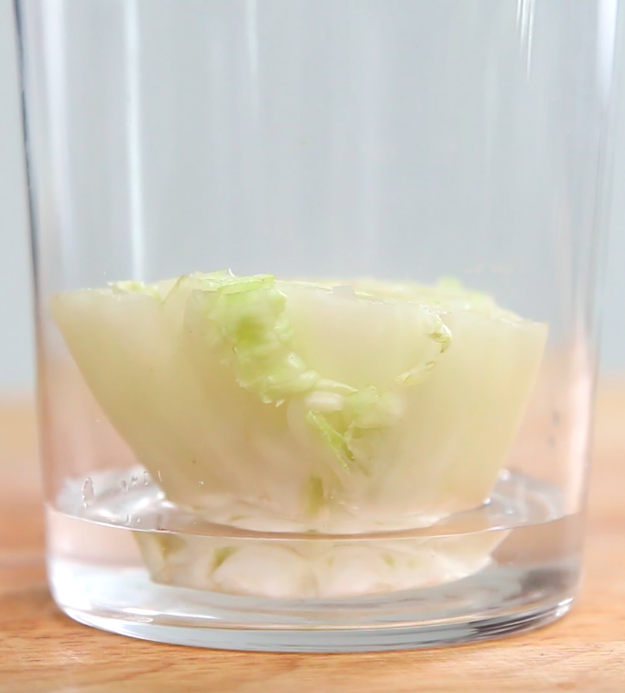
Instructions for the lettuce:

Instructions for the lettuce:
1. When cutting, keep approximately 2 inches of the base intact. 
2. Set the lettuce on its base in a glass with ½ inch of water, and place it in sunlight. Change the water every day.
3. After 5-7 days, some new leaves should have begun to sprout from the center, and roots should be forming. Transfer it to soil and you can begin harvesting leaves when they reach 6-8 inches tall.

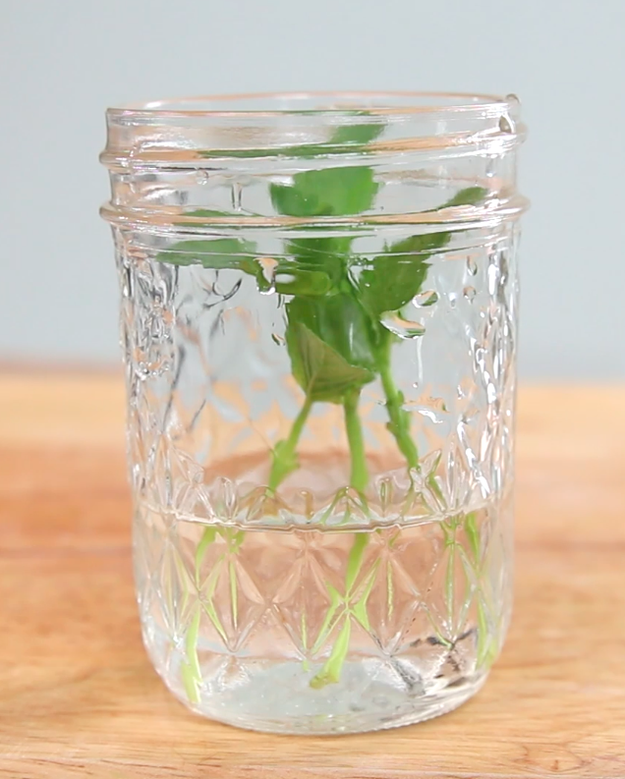
Instructions for the mint and basil:

Instructions for the mint and basil:
1. Cut approximately 3 inches from a fresh stem, just above a node. Remove the leaves along the bottom 2 inches of the cutting.
2. Place the cuttings in water, keeping the leaves on top above the water. 
3. After roots have formed and grown 2 inches, transplant to soil. You can begin harvesting when the plant is fully grown with mature leaves.

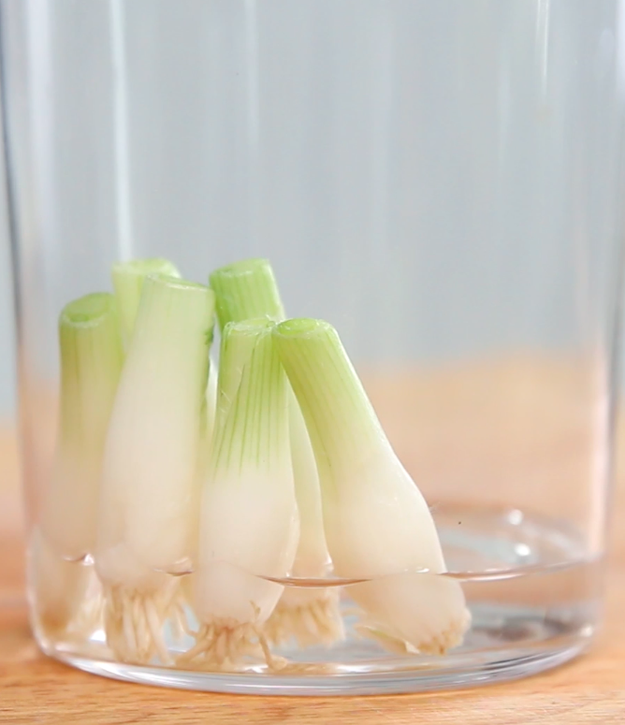
Instructions for the green onion:

Instructions for the green onion:
1. When cutting, keep approximately 2 inches of the roots and base intact.
2. Place the roots in ½ inch of water with sunlight. Change the water every other day.
3. Transfer to soil after 5-7 days or keep in the glass of water. You can begin harvesting when they are fully grown.

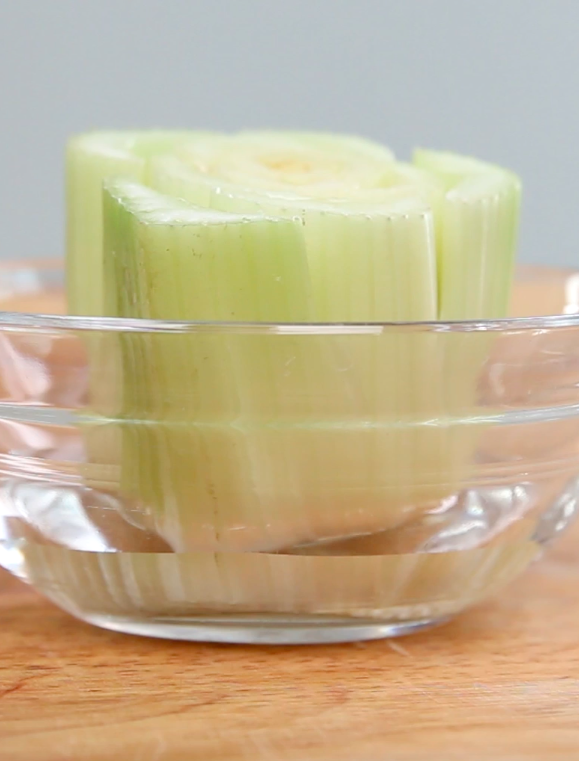
Instructions for the celery:

Instructions for the celery:
1. When cutting, keep approximately 2 inches of the base intact.
2. Set it on its base in a glass with ½ inch of water with sunlight. Change the water every other day.
3. After 5-7 days, the leaves in the center should be a deeper green. Transplant it to soil and you can begin harvesting when it is fully grown with stalks.

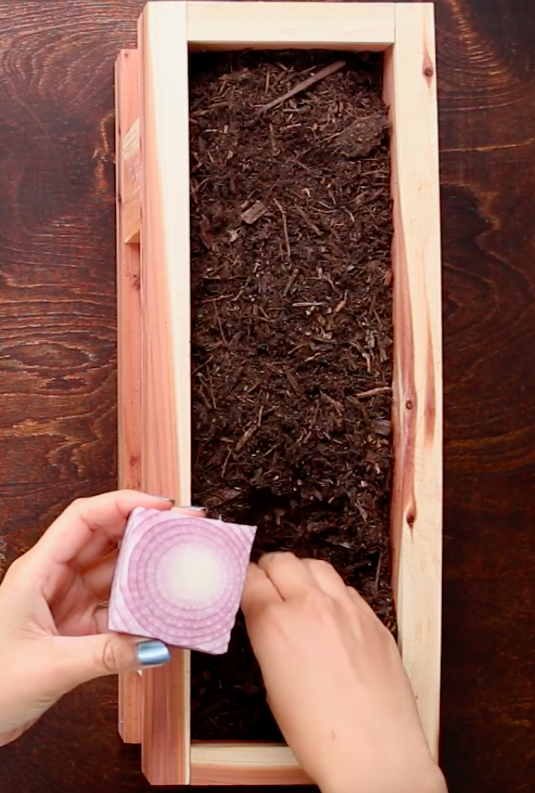
Instructions for the onion:

Instructions for the onion:
1. Your onion scraps should still have approximately 1-2 inches of the root base intact.
2. Plant directly into soil with a thin layer of soil covering the cut top. To make room in your garden, you can trim the sides of the onion as only the center is needed for regrowth.
3. Harvest the onions when the green tops have yellowed and fallen over.

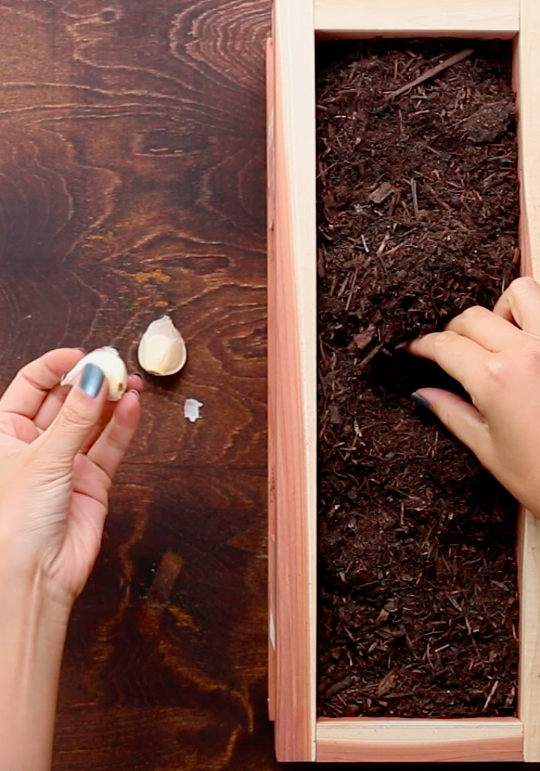
Instructions for the garlic:

Instructions for the garlic:
1. Select the large outer cloves from your bulb.
2. Plant directly into soil with the base facing downwards. Cover with approximately 2 inches of soil and pat down firmly.
3. They are ready to harvest when the green tops have started to brown and wilt.

Tree Art


Who doesn’t love beautiful art in their surroundings? Have you ever seen some tree art in gardens? Espalier is an art of trees in which pruning of trees or shrubs against a wall, and the arrangement of these trees is somewhat symmetrical and geometrical in shape.
Trees trained into flat, two-dimensional shapes are just fantastic and add great value to the garden. When these trees are grown against the walls, they reflect sunlight and prevent heat waves to impact the wall directly.
There are several techniques to train and transform shapes into flat espaliers. 


Wednesday, 14 September 2016

Friday, 9 September 2016

Scrabble Tiles Coasters

Scrabble Tiles Coasters


What you need:


  • Scrabble Tiles
  • Cork sheet
  • Pen/Sharpie
  • X-acto Knife
  • Ruler
  • E6000 Glue

Instructions:


  1. Spell out a word or phrase of your choice in a 4×4 or 4×5 grid.
  2. Mark the size of the arrangement out onto the cork board. 
  3. Cut the cork sheet to size.
  4. Apply E6000 to Cork Board. 
  5. Place the letters onto the cork sheet. 
  6. Let set overnight.

COMPLETE!

Source: Buzzfeed


Saturday, 6 August 2016

Cat Hammock

Click here for the Video for cat hammock


What you need:

· Old T-shirt
· Storage container
· Pen
· Scissors

Instructions:

1. Put an old T-shirt on a flat surface. 
2. Place a storage container, upside down, on the shirt and trace using a pen. Add about 2 inches on all sides. 
3. Cut out the larger shape of the container using scissors; cut strips in towards the original trace mark. 
4. Tie strips around the storage container; double knotting as you go.
Source: Buzzfeed

Tuesday, 12 July 2016

Light up a bottle

Empty wine bottles make great lights..

1.
Take colourful empty wine bottles, and Christmas string lights lying around for this super-simple DIY idea. Insert the lights into the bottle, and make an opening on the lower back side for the plug. Mix-and-match colours for a Bohemian look. Light them up for a dreamy aura!


Here's how to cut the bottle:


2. Candles


Decorative bottles

Use empty wine bottles to create a piece of art.

Paint or glue scrap book paper onto an old bottle of any size or shape.


Sunday, 26 June 2016

Watering plants while on vacation

Keeping your plants watered while you are away on vacation can be a hassle, especially for plants in containers or those in the ground that require a lot of moisture. If you can't find a neighbor to give them a daily dousing for you, you might want to try one of the bottle methods. Be sure to test those methods before your vacation to see how long they will keep soil damp in your climate.

Watering Containers with Upended Plastic Bottles


1) Prepare two-liter plastic bottles by making holes in their caps. Hold a small nail so that its tip is at the center of a bottle cap. Tap the head of the nail with the hammer to drive the nail through the cap. Pull the nail out and repeat the process with your other bottles. Alternatively, replace the caps with screw-on funnel-shaped irrigation spikes, available from your garden center, that slow down the release of water from the bottles.

2) Fill each bottle with water. Screw on either its punctured cap or one of the irrigation spikes.

3) Water the soil thoroughly before inserting the bottles. Turn the bottle upside-down and push it into the soil beside the plant you wish to water. Make sure the bottle is stable enough that it won't tip over. Repeat the process with your other bottles.

Watering Containers with Bottles and Wicks

1) Remove the caps from your bottles and fill them with water. Set one of the bottles on top of the soil in the container you wish to water or place it nearby so that it sits higher than the container it is watering.

2) Cut a length of nylon parachute or other absorbent cord long enough to run from the base of the bottle, out its top, down its side and several inches into the container's soil. Insert one end of the cord into the bottle and make sure it falls all the way to the bottom.

3) Stab the other end of the cord several inches into the container's soil, using a screwdriver. Repeat this method with the other bottles and containers.

Things You Will Need

  • Two-liter plastic bottles
  • Hammer
  • Small nail
  • Plastic irrigation spikes that screw on to two-liter bottles (optional)
  • Water
  • Watering can
  • Nylon parachute cord or other absorbent cord
  • Screwdriver

Tip
When using upended plastic bottles, some gardeners prefer to completely remove the lid from the plastic bottle, rather than puncturing it. This, however, may make it more difficult to turn the bottle upside down without losing much of its contents in the process. Some people also cut off the bottom of the bottle, so they can pour water into it after it is already in place, but this could cause some of that water to be lost to evaporation.

Warning
Be sure to take into account the possibility that the bottles could get knocked over by curious or thirsty animals outdoors

Source: Nursery Live

Saturday, 21 May 2016

Cat Planters


What you need:

*Empty Clear Plastic Bottle
*Spray Paint
*Paint Markers
*Gravel
*Potting Soil
*Succulents

Instructions:

Start off by drawing cat ears on an empty clear plastic bottle. Align the ears to two of the bottom nubs of the bottle to create the “feet”. Carefully cut out the outline of your planter. Lightly spray the inside of your planter followed by a second coat of a different color paint to create different colored tones for your cat. Wait for the paint to dry. Using paint markers draw on your cat’s face. Add gravel, followed by potting soil. Place your plant or your succulent into you planter. Pat the soil down and water lightly.
This project was inspired by this blog post.

Thursday, 12 May 2016

Peel eggs easy

Add a 1/2 teaspoon of baking soda to the water while boiling eggs...the shell will come right off when peeling.


Saturday, 7 May 2016

Handy Shoe Rack


Handy shoe 'rack'

Attach a set of coat hangers on your wall near the bottom. It makes a great and handy shoe rack. Be careful when you have dogs though. They get easy access to your delicious shoes like this.


Retro Pin Board

Retro pin board


Get an old looking frame from car boot sale or charity shop, and frame your pin board. Keep postcards from all over the world.


Thursday, 5 May 2016

Not Bad

Raising three kids is not that easy. It's more difficult than you'd think, and if you even knew how difficult, you'll never have children of your own. But mother nature plays it so, that you are blinded and temporary insane when you decide to become a mother.

It's been a tough 20 years so far, and time and time again I have said that I'm a bad mother. Bad, because I'm not like other mothers. I'm not as strict, and I raised my children as free human beings. I pull the reigns now and again but most of the time, I let them be whatever they want to be, do what they want to do and make their own choices.

I have felt I was a bad mom, because I don't know first thing about raising kids. But now that they are older, I do think that I've done a good job.  When I see how my girls are into the arts, it makes me proud and happy. I'm happy, because they are following their hearts.

I am so proud that my 11 y.o. is interested in watching plays, I'm happy they both like drawing and painting. They don't need to study English or Science for me. I'm happiest when they go into the arts world. It may be a tough world, but it's a special world.

Drawing by Ya-El Ahmed

Wednesday, 4 May 2016

Pineapple parrot

Create a pineapple parrot


Watering plants

Make sure you put the cap back on the bottle to close it to keep the water clean.


Monday, 25 April 2016

Make cool garden ornaments

Garden ornaments with cement


Needed:

  • Latex Gloves
  • Cement
  • Water
  • Trowel
1. Filling

First fill up your latex gloves with the fresh cement, making sure to fold the fingers in the shape you would like them to be permanently.


2. Removing

Once the cement hardens, you will have a life-like pair of hands. Gently remove the latex gloves, making sure not to break a finger off. Make sure they are dried fully.


3. Planting

Add soil and the flowers of your choice into the center of your hands.